Angularでルーティングしよう
2018/08/31
はじめに
Angularとは?という方はこの記事をご覧ください。
前提
angular-cliインストール済
ルーティングって?
簡単にいうと、URLによって表示するコンポーネントを切り替えることです。
今回やること
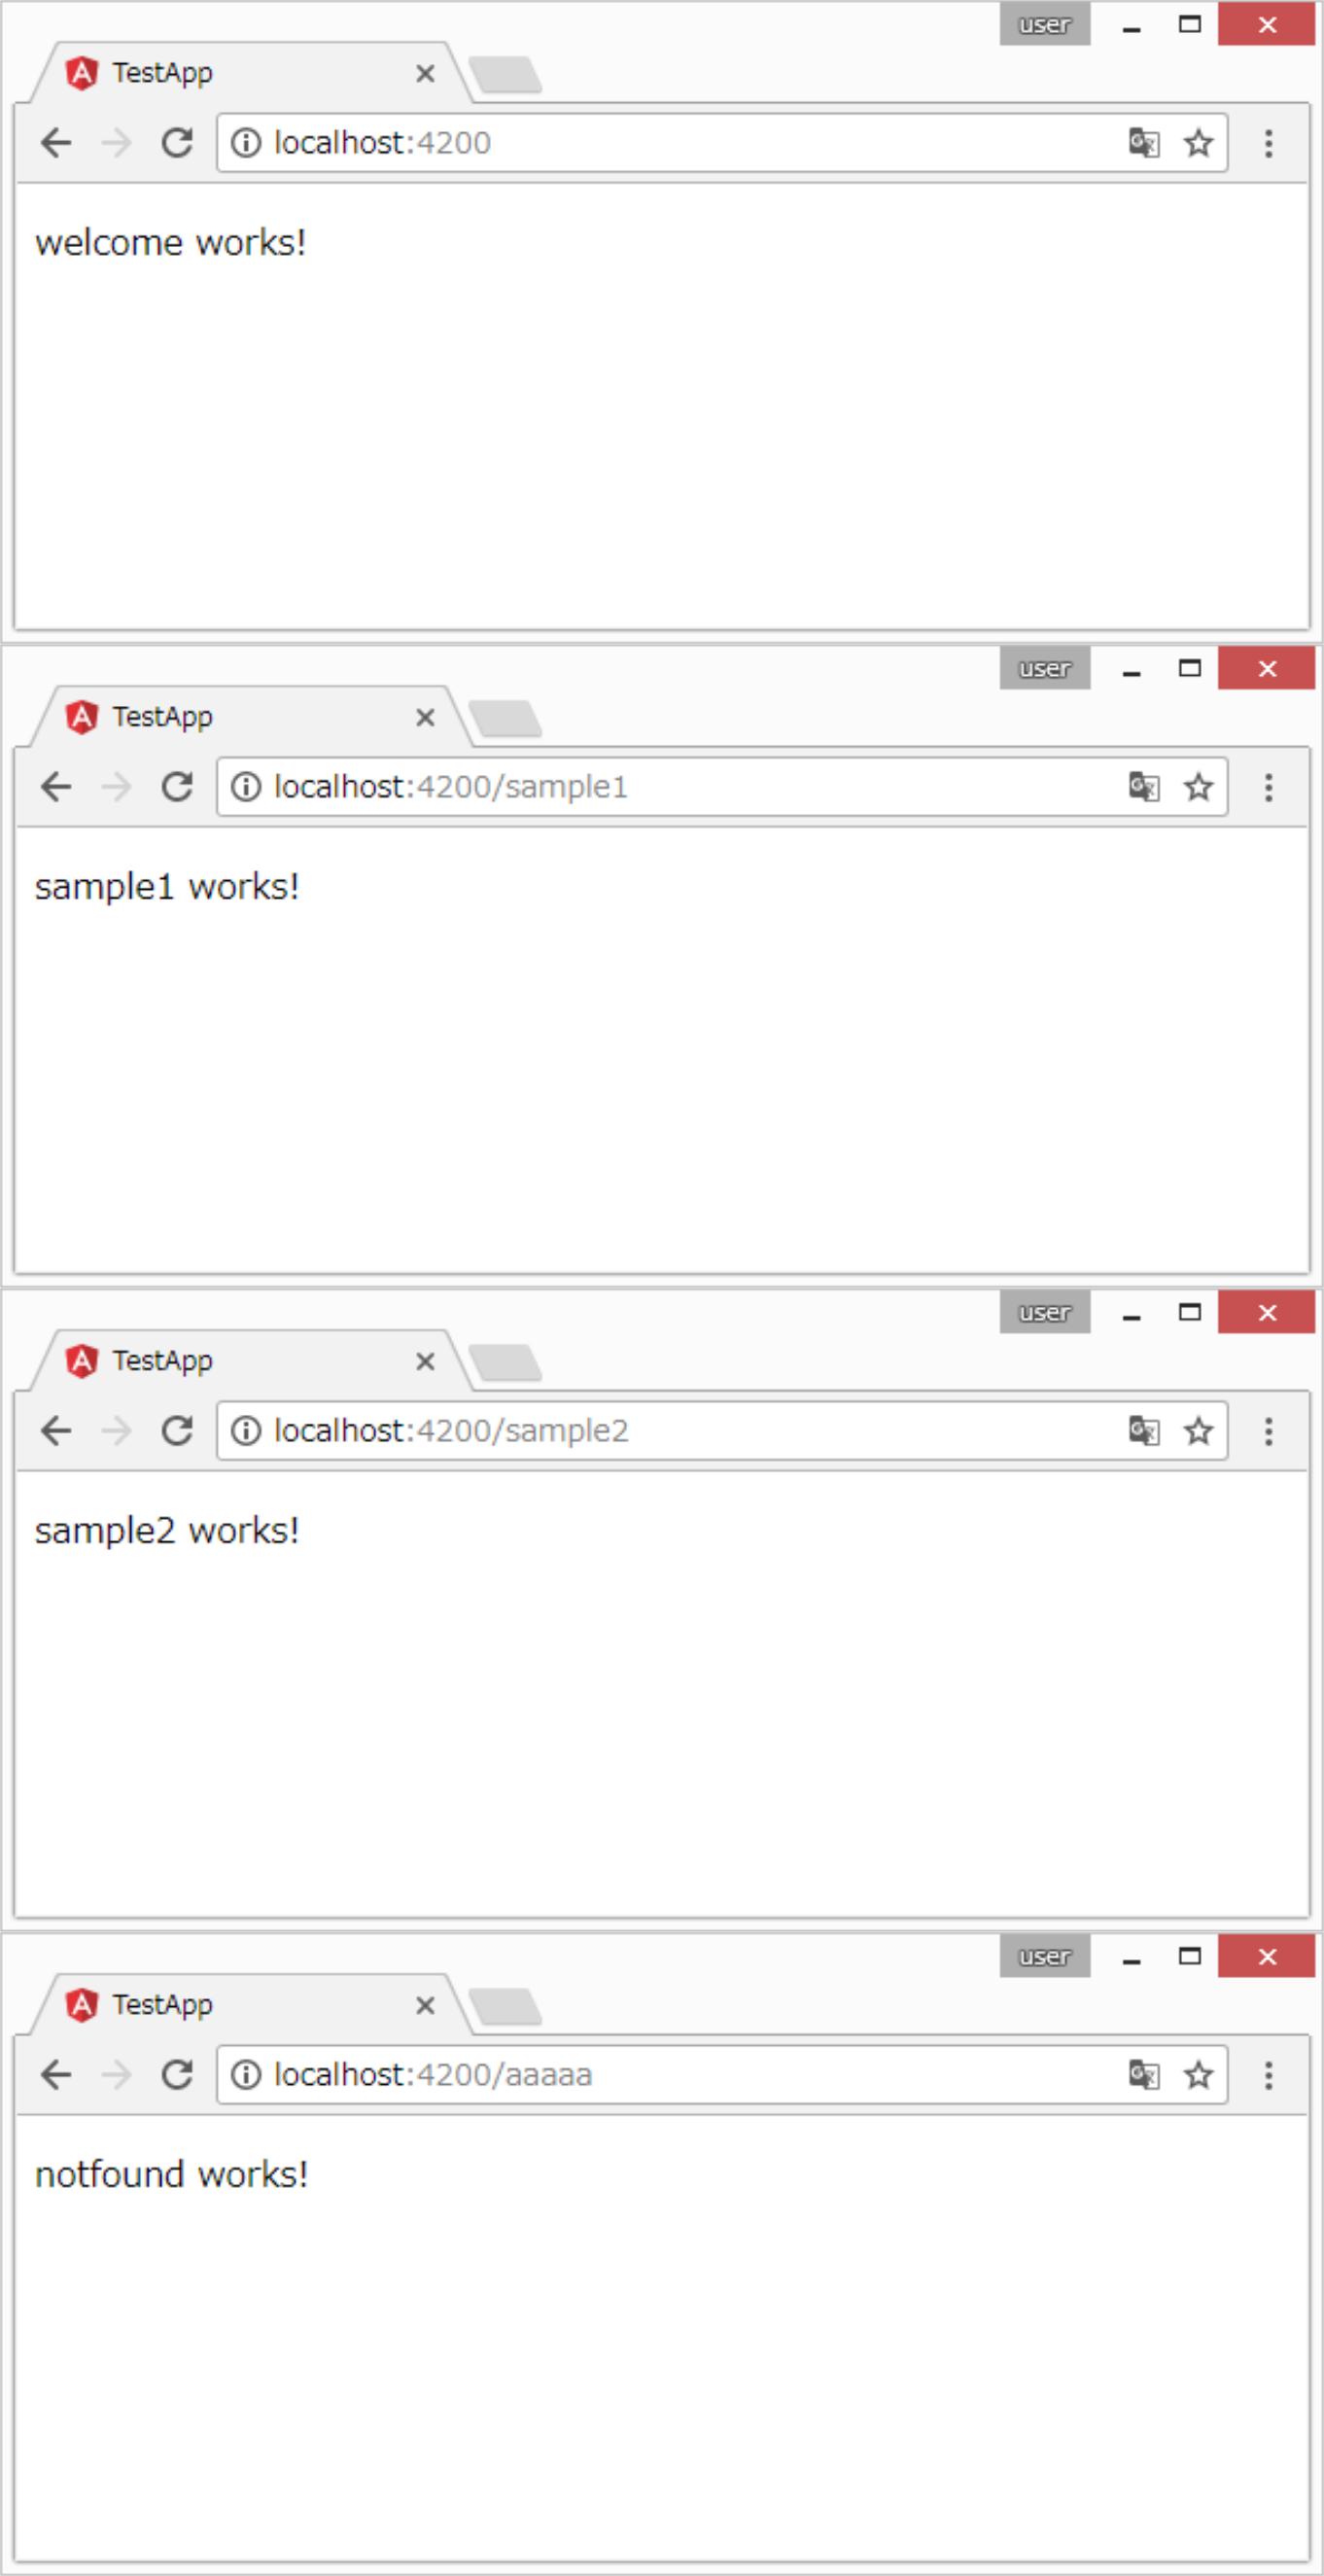
下記のURLを入力して、対応するコンポーネントが表示されるアプリを作ります。
リンクテキストの作り方、コンポーネント内でのURL変更は別の記事として書こうと思います。
| URL | 表示するコンポーネント |
|---|---|
| / | WelcomeComponent |
| /sample1 | Sample1Component |
| /sample2 | Sample2Component |
| それ以外 | NotFoundComponent |
プロジェクト作成~コンポーネント生成~開発サーバ起動
app-routing.module.tsを含むプロジェクトを作成し、
各コンポーネントを生成します。
最後に開発サーバを起動します。
> ng new testApp --routing
> cd path/to/testApp
> ng g component welcome
> ng g component sample1
> ng g component sample2
> ng g component notfound
> ng serve
ルーティング設定の修正
app-routing.module.ts
デフォルトでは何の設定もないので、必要な設定を書いていきます。
「path: ''」(空文字)はルートのルーティングです。
「path: '**'」は全てという意味になります。
ルーティング設定は上から順に優先度が高いため、
「path: '**'」を一番下に書くことで「上記以外」を実現しています。
import { NgModule } from '@angular/core';
import { Routes, RouterModule } from '@angular/router';

// 修正はじめ
import { WelcomeComponent } from './welcome/welcome.component';
import { Sample1Component } from './sample1/sample1.component';
import { Sample2Component } from './sample2/sample2.component';
import { NotfoundComponent } from './notfound/notfound.component';

const routes: Routes = [
  { path: '', component: WelcomeComponent },
  { path: 'sample1', component: Sample1Component },
  { path: 'sample2', component: Sample2Component },
  { path: '**', component: NotfoundComponent }
];
// 修正おわり

@NgModule({
  imports: [RouterModule.forRoot(routes)],
  exports: [RouterModule]
})
export class AppRoutingModule { }
不要ソースの削除
app.module.html
<router-outlet></router-outlet>のみ記載する。
動作確認
補足
AngularのRouterには上記以外にもRESTのルーティング設定、パラメータの設定、パスの照合方法の設定(前方一致または完全一致)、リダイレクトなどの機能があります。
大規模なシングルページアプリケーションにルーティングは必要不可欠な技術ですし、勉強してみてはいかがでしょうか?